Home Office via Citrix Workspace App on Raspberry PI OS Buster
The Raspberry Pi 4 single board computer supports dual screen configurations and thus has become a silent, serious candidate for Home Office work.
I am using a Raspberry Pi 4 4GB, with Raspberry PI OS Buster, 2x screen with an USB speakerphone. The assumption is that Raspberry PI OS is installed with the LXDE-pi desktop and that the displays are working.
What you will find in this HowTo
- Configuration of Raspberry PI OS to be able to use a dual screen setup with the Citrix Workspace App.
- Setup echo cancellation with Pulseaudio to be able to make Teams / Skype4Business via Citrix Workspace.
Ths HowTo uses nano as text editor. So wherever you see nano you can use a different editor.
Positives and Negatives
- The Citrix Workspace App
+ can be downloaded as armhf Debian package for Buster on the Citrix website
+ comes with it’s own outdated certificate store, that most likely requires an update
+ the memory usage is low enough that even the 1GB model should suffice
- requires a different window manager than openbox due to missing multi-monitor hints
- no optimization for realtime audio (Skype calls, etc.) - Raspberry PI OS Desktop
+ the LXDE-pi desktop is sleek and nicely customized
- the lightweight LXDE desktop does not fulfil all assumptions expected by “business” apps
- I could not get a Bluetooth headset to work on Raspberry Pi OS, if the headset had the hands-free profile, the microphone could not be used and if the microphone got detected (a different device), the audio quality was really bad and the recording unstable.
- from my personal experience the Alsa sound system is not nearly as usable as Pulseaudio for an end user
- Raspberry Pi Desktop starts to slow down after a few hours of use and the Xorg process shows almost 100% CPU. Logging out and in again workarounds this problem.
I discovered that this does not happen if gpu_mem is bumped to 320MB and 4k60Hz mode is activated in /boot/config.txt:hdmi_enable_4kp60=1 gpu_mem=320
Citrix Workspace App Installation
The Citrix Workspace App can be downloaded via the Citrix homepage.
Citrix Workspace app for Linux (ARM HF)
Navigate to Available Downloads → Debian Packages → Full Packages and click Download file
Since version Dec 12, 2019 the package can be directly installed via gdebi package manager. All required packages will automatically be downloaded. To install open the Downloads folder in the file manager, right-click on the icaclient*.deb package and install the package.
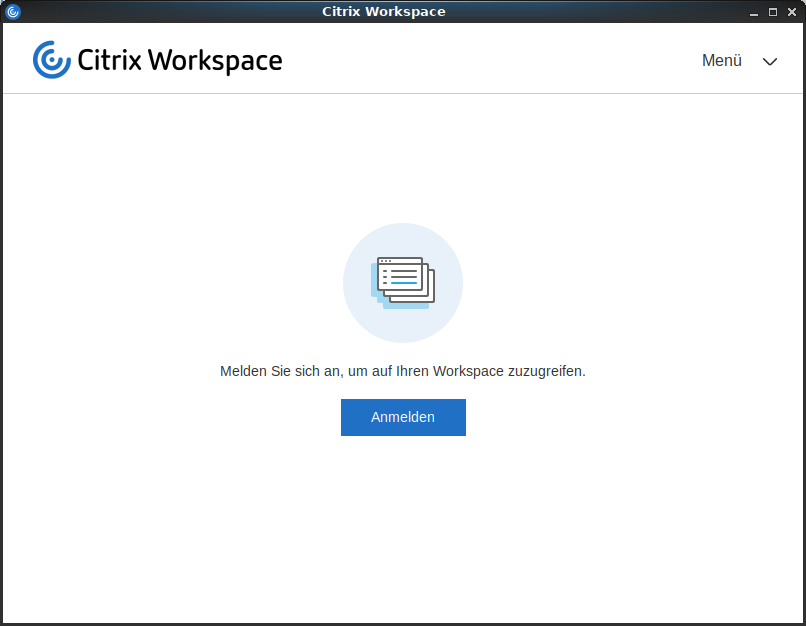
You now can launch Citrix Workspace via Menu → Internet → Citrix Workspace
SSL Connection Problems
Should you be unable to connect, and get a SSL connection could not be established error then it is highly likely that this is due
to missing certificate authority (ca) certificates delivered with the Citrix Workspace App.
In order to make Citrix Workspace use the ca cert’s of Raspberry Pi OS:
sudo ln -s /etc/ssl/certs/*.pem /opt/Citrix/ICAClient/keystore/cacerts/
Now you should be able to connect.
Notable User Settings in wfclient.ini
In the user settings folder of the Citrix Workspace App (former ICAClient) is wfclient.ini where several adjustments can be made.
Citrix Workspace App for Linux Product Documentation
Citrix Workspace App for Linux OEM Reference Guide
To edit
cd ~/.ICAClient
nano wfclient.ini
Force a switch of the Keyboard Layout
I had to change KeyboardLayout=(User Profile) to KeyboardLayout=German to get a german keyboard layout, the automatic detection did not work on Raspberry Pi OS, maybe there is a smarter way.
Some keys not woring with X inside Citrix client
Set medium audio quality
I found that for using online meetings via Skype4Business tunneled through the SSL connection setting medium audio quality works best for me.
To set medium audio quality on the client add a line with AudioBandwithLimit=1 to the [WFClient] section.
Dual-Screen Fullscreen
Citrix Workspace supports fullscreen over dual screens layouts and so does the Raspberry Pi. Unfortunately the default window manager Openbox lacks the correct hints for the Citrix Workspace App. The only way around it is to us a different window manager.
I didn’t use the icwm window manager, but went for Marco, the window manager of the Mate desktop environment. So if you have installed Mate, instead of LXDE, everything is fine. Marco does not require one gazillion of additional libraries, is still relatively light weight and can be configured via command line.
Marco, MATE default window manager
Installation
Install the packages via apt
sudo apt install marco mate-themes
In order for mate to be used, the window manager of the LXDE-pi desktop has to be changed.
This can either be accomplished for all users or just for a single user by changing the window manger in desktop.conf.
For a global configuration, edit the file:
sudo nano /etc/xdg/lxsession/LXDE-pi/desktop.conf
For a configuration for the current user only, copy desktop.conf to your user directory and change the window manager.
cp /etc/xdg/lxsession/LXDE-pi/desktop.conf ~/.config/lxsession/LXDE-pi/
nano ~/.config/lxsession/LXDE-pi/desktop.conf
Change
window_manager=openbox-lxde-pi
to
#window_manager=openbox-lxde-pi
window_manager=marco
If you log out of your X11 session an login again, the desktop will no longer use openbox as window manager, but marco instead.
Configure marco
I configured marco to use a single workspace (the default is 4), the Blue-Submarine theme because it is a good fit for Raspberry Pi OS colors and sloppy window focus mode. Sloppy means that an open window will get the focus once you hover the mouse over it.
gsettings set org.mate.Marco.general num-workspaces 1
gsettings set org.mate.Marco.general theme Blue-Submarine
gsettings set org.mate.Marco.general focus-mode sloppy
Once you have done that Citrix Workspace will look like

Speakerphone or Headset with Echo Cancellation via Pulseaudio
I was trying to use Skype4Business calls via Citrix Workspace App and a cheap USB Speakerphone, because I hate wearing headsets. My first experience was abysmal. I had to fiddle with the microphone volume and then there always was an echo effect where colleagues could here themselves or sounding like “Mr. Roboto”.
As I was able to use the speakerphone without any echo effect in a local Microsoft Teams session on both a PC and a Mac, I suppose that Teams does echo cancellation all by itself if it is running locally. I also suppose that this is the case for it’s predecessor Skype4Business. I guess that it does not work over Citrix Workspace App on armhf, because there is no optimized “realtime” Citrix HDX audio available over a TLS connection.
Luckily there is Linux the tinker-os. You can install, compile or configure almost anything, although you may rip your hair out on the voyage to achieve the goal. The goal in this case is to do not rely on Skype4Business to do echo cancellation, but to use a locally running software, so that the cheap speakerphone will behave like an expensive speakerphone and performs acoustic echo cancellation.
The software that can do that on Raspberry Pi OS is the pulseaudio daemon with it’s module-echo-cancel.
Installation
First you need to install pulseaudio and it’s graphical mixer application pavucontrol:
sudo apt install pulseaudio pavucontrol
Switching from Alsa to Pulseaudio
Raspberry Pi OS buster is using the Alsa sound system for audio an not Pulseaudio as it did in Raspberry Pi OS stretch. In my personal experience Alsa is not as user friendly, it lacks some features of Pulseaudio and is more complicated to configure.
Alsa can be configured to use Pulseaudio for input / output and mixer control.
To do that make a backup copy of your ~/.asoundrc and set pulse as default audio device and mixer.
cd ~
mv .asoundrc .asoundrc.orig
nano .asoundrc
Add the lines in the editor.
pcm.default pulse
ctl.default pulse
Raspberry PI OS uses the volume control in the panel to configure alsa, so it is best to remove it from the panel to prevent an accidental use and destruction of .asoundrc.
To remove the Volume Control (Alsa/BT) from the panel right-click on the icon
 and select “remove volume control from the panel”.
After that, log out of your X11 session or reboot. The pulseaudio daemon will be started when you log in into your X11 session.
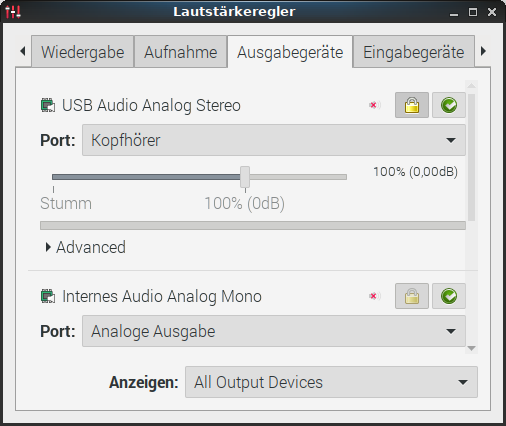
To test if there is audio via pulseaudio, open the Pulseaudio Mixer, where you should have an output and an input audio device.

Now you can add back a different Volume control applet to the panel, by right clicking on an empty space in the panel and selecting Add/remove panel entities. Choose Add and select Volume Control - not Volume Control (Alsa/BT).
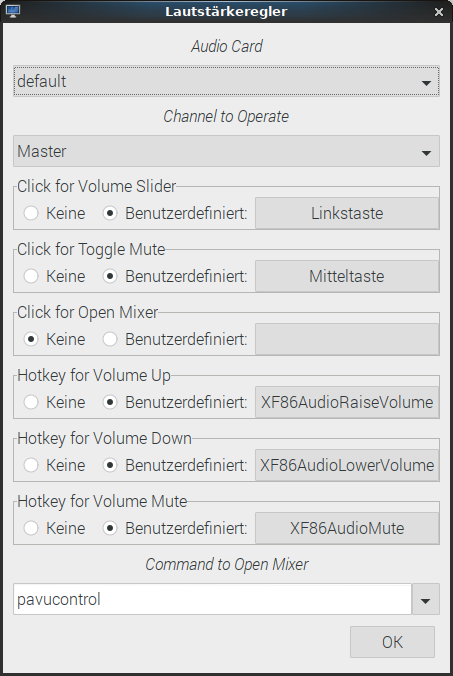
After adding the Volume Control to the panel you can configure it’s settings:

The important part is to select “pavucontol” as Command to Open Mixer.
Now any app, for example when Chromium is playing audio, should be using Pulseaudio.
Finally it is time to configure acoustic echo cancellation in /etc/pulse/default.pa
Configuring Acoustic Echo Cancellation
I forcefully enabled echo cancellation and set the device with echo cancellation to be used as default microphone and default speaker. For acoustic echo cancellation to work the output audio signal from the speaker that is received by the microphone is removed before sending it to the application.
General documentation about this module can be found at the Pulseaudio documentation: module-echo-cancel
sudo nano /etc/pulse/default.pa
Here is what worked best for me with the omnidirectional microphone in the speakerphone. With the setting below I can listen to music and perform conference calls via the speakerphone without too many audio distortions.
Webrtc with extended filter
It uses the webrtc method developed by Google. It turns off analog gain control (moving the volume slider), turns on digital gain control (audio gain controlled via signal processing) and enables the extended filter. The standard filter was not good enough without reducing the signal sampling rate of the microphone and speaker. This setting is the best for me when it comes to echo cancellation. It is almost perfect, almost. It has a big drawback, however. During double-talk it reduces the volume of your voice, so that you almost cannot be understood by the other people in the meeting.
In the default.pa file add at the end:
load-module module-echo-cancel source_name=noechosource sink_name=noechosink aec_method=webrtc aec_args="analog_gain_control=0 digital_gain_control=1 extended_filter=1"
set-default-source noechosource
set-default-sink noechosink
Alternative Setting: Speex with mono mic channel
This setup works fairly well, but has some problems with slight echo from time to time. Especially after double-talk during conferences. It uses the speex echo cancellation with the source reduced to a single channel. A small frame size of 5ms finally resulted in good echo cancellation with speex. I never got it to work properly with the default settings. Due to the fiddly experience I had, I guess most people will need to do tuning of these parameters.
In the default.pa file add at the end:
load-module module-echo-cancel source_properties="channels=1" source_name=noechosource sink_name=noechosink aec_method=speex aec_args="frame_size_ms=5 filter_size_ms=100"
set-default-source noechosource
set-default-sink noechosink
Alternative Setting: Low quality mono audio
I found another combination, that did work out ok’ish for audio calls with the effect that the audio is muffled. You can forget to listen to music with this setting, it will sound like you listen to music on the other end of a transatlantic call at the beginning of the 90’s. It could be best if you are on a slow connection.
These settings are from here: Using PulseAudio: module echo cancel
In the default.pa file add at the end:
load-module module-echo-cancel source_name=noechosource sink_name=noechosink aec_method=webrtc rate=8000 channels=1
set-default-source noechosource
set-default-sink noechosink
Alternative Setting: Beam forming with directional microphones
If you have a device with multiple directional microphones, for example a webcam, the beam forming method may work best for acoustic echo cancellation. For details see the module-echo-cancel documentation. Here is the example from it, which I couldn’t test.
If you have a webcam with 2 microphones 8cm apart, and you want to point it forwards, you could use
In the default.pa file add at the end:
load-module module-echo-cancel source_name=noechosource sink_name=noechosink aec_method=webrtc aec_args="analog_gain_control=0 digital_gain_control=1 beamforming=1 mic_geometry=-0.04,0,0,0.04,0,0"
set-default-source noechosource
set-default-sink noechosink
Testing Acoustic Echo Cancellation
After you have changed the Pulseaudio configuration, you need to reload the pulseaudio daemon in your user session.
pulseaudio -k
If you re-open pavucontrol, you should now see one output and one input device that has echo cancellation enabled. Because this device has been set as default all audio will be played through the output device and all recordings happen through the input device with echo cancellation.


In order to the setup you need a program that plays audio and an audio recording software. For playing audio, I can recommend to play a Youtube Covid talk show via Chromium, because the spoken audio is very similar to an online meeting.
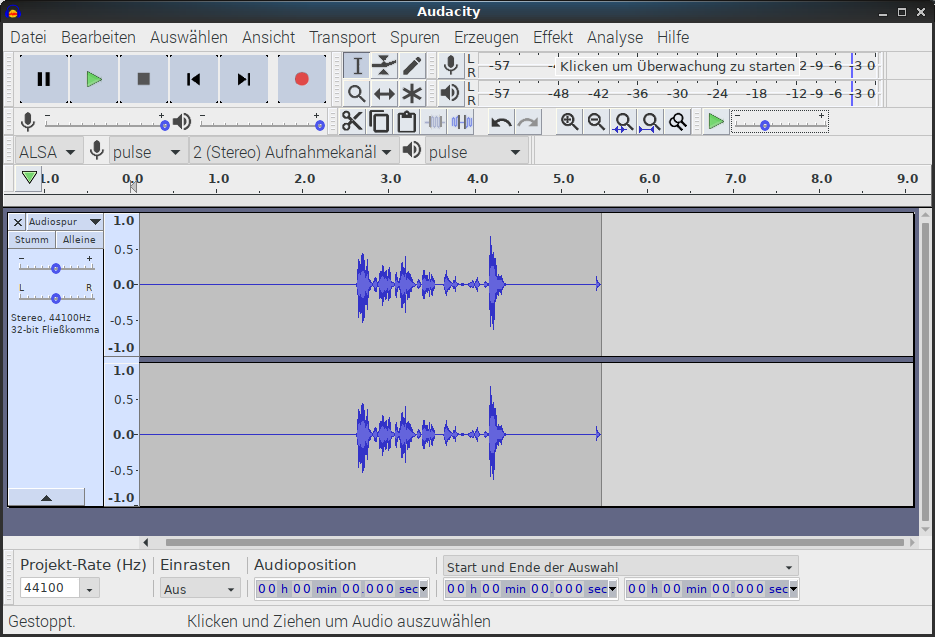
For recording, I’d recommend Audacity, which needs to be installed first.
sudo apt install audacity
You can now start it from the menu.

The real test:
- Start Chromium and play a talk show
- Press the record button and start talking, after that press the stop button
 If everything went well, there should be no signal for all that was played through the speaker and a waveform when you were talking.
 - To check, press the play button in Audacity
Ideally, everything played through the speaker should be completely gone, but echo cancellation is not perfect. Thus you may want to experiment with the module-echo-cancel settings until you find a setup that works for you.